Tuesday, February 16, 2010

Early 18th Century Economics Woes in France Under Louis XV, or, How the Silhouette Got its Name

Étienne de Silhouette was the French Controller-General of Finance under Louis the XV.

In 1760, a huge budget crisis hit France. To combat the lack of income for the country, de Silhouette dramatically raised the taxes on the richest noblemen of France and instituted several laws including the melting of gold and silverware.

This didn't exactly sit well with the wealthiest of France, and his reputation among them was less than stellar.


A group (and extremely valuable) silhouette by Auguste Edouart


Silhouettes, the art form, were very popular at the time and were often purchased by all economic classes, however they were some of the only records of appearance available to people who were not able to hire an artist to paint their portrait (remember, at this time photography had not been invented). While they were well known, they were referred to by many names including Shadows, Casts, Shapes, and Shades.

In the late 17th century, the anger towards de Silhouette transformed itself into the derogatory use of his name towards anything of lesser value, or cheaply made. Silhouettes, the papercutting, took on this name as an adjective at this time.

Auguste Edouart, without doubt the most famous of all silhouette artists (I'm working hard to be #2), began using the term "Silhouette" to market and promote his goods as he did not like the name Shadow or Shade. Cutting over 100,000 silhouettes across Europe of famous people, dignitaries, royalty, and the general public, his popularity and ubiquitous nature caused his term Silhouette to permanently adhere to the cut paper artform.

Silhouette has now spread from the person, to the art form, to anything shadow or darkened outline of a person, place, or thing.

As Seen on TV

So Saturday was my big TV debut. Well, my artwork debuted on tv, not me, but it's better looking anyway.


I was contacted at the end of January by Lindsay Roberts, an Advertising Assistant for Good Housekeeping Magazine and blogger, who writes the blog Gift Giving With Love

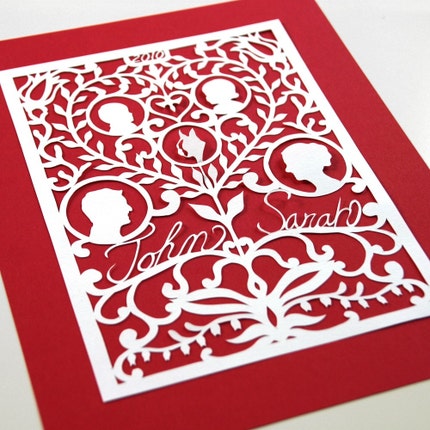
I made a custom silhouette for her parent's anniversary based on an old photo from their wedding.

She regularly makes appearances on Fox News in Detroit to show great gift giving ideas, and this Valentine's Day she showed the silhouette I made for her and her parents. Very exciting! The video is below (I'm about 3:30 into it)


Lindsay did a phenomenal job on the presentation, I can't imagine staying composed on TV! Thanks so much Lindsay for finding me and showing my work!

Go check out her great blog, if you haven't already: Gift Giving With Love

Sunday, February 14, 2010

Papercutting tips: Guide to paper

Like the adhesive post, this post is also focused mostly on one product, but I'll include some helpful tips afterwards for picking out good paper.

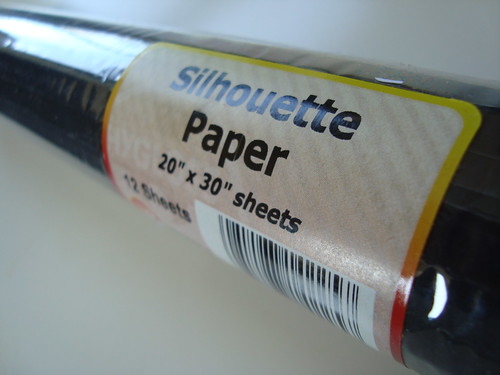
I use, pretty much exclusively, Hygloss Silhouette paper from DickBlick: http://www.dickblick.com/products/hygloss-black-silhouette-paper/

I buy it in rolls of twelve 20x30 sheets, and depending on how busy I am they last about a month or two.

Silhouette paper from Blick in the roll

An un-cut sheet of silhouette paper

This paper is incredible! It is actually white paper that has been covered in a thin layer of matte-black paint. This is good for two reasons: 1, you have one side that is white so you can draw a design on it, and 2. because it's painted, there is less chance of the black fading over time. More about that later.


The "white side" of the paper

I work from the white side of the paper, which means that when I'm done, my designs get flipped around. This is very important when you work from the white side! If you are doing anything that can not be backwards (text, recognizable architecture, etc) you will need to cut your design backwards. In my case, I always create my designs in the computer (easy to resize, tweek, and otherwise mess around with my original designs before cutting them), so before I start cutting I flip my designs backwards, print them as a pattern, and adhere them to the white side of the paper with a bit of light-tack spray adhesive from Krylon

When I finish cutting the design, I peel off the pattern and flip the silhouette paper over to the finished black side.

One draw back of this particular paper is that it does come very tightly rolled, so the paper has a lot of curl to it when you first open it. I have a very large wooden shelf-like thing that store my unrolled paper in. I put the sheets of silhouette paper between two larger sheets of regular paper and then put something heavy on top to hold the paper flat. In about a week most of the curl is out of the paper, but the first few sheets really want to roll while you're working with them.

Another minor drawback is that because it's painted, not dyed, it doesn't like to be folded. The paint doesn't crack, but you can definitely see the white try to peek through the black along the folds. Also creasing the folds can lead to abrasion of the paint and wear it through to the white.

Don't iron them! I tried this and it made them kind of wavy even without steam. Not sure why. Just press them between something heavy.

Okay, that all said, here are some more general tips on picking out paper:

- Acid free and Lignin free are EXTREMELY important! Can't stress this enough. The natural acid and lignin found in most wood/paper needs to be removed or your paper will discolor, become brittle, and possibly simply fall apart over time. Look for fade-resistant paper (should be labeled as such) if you are using non-white paper. The paint on the sihouette paper is much less likely to fade as it is more light-fast

-Thin is good, but too thin is a nightmare. You want the paper to be easy to cut, but not so fragile that you are constantly tearing it. I recommend not going much past 70 pound paper unless you want a really good hand cramp.

-Texture is very important. You want the paper have very tiny fibers in it. If the fibers are too large, your corners and areas where the paper isn't cut completely through will have stringy bits of fiber sticking out of them. This is a huge pet peeve of mine and, in my opinion, a very good indication of the quality and skill of a papercut. You want all your edges, corners, and cuts to be clean with very little overcutting (cutting beyond the intersection of two lines). Hand-made paper is beautiful and I would love to work with it, but it's extremely fibrous. I'm not above tearing a 2mm tear in the edge of paper to see how clean it is, but you can usually tell just by running your hands on the paper. The less texture, the smoother the paper, the better.

Some paper is actually died after it is rolled, whereas with others, the pulp of the paper is dyed first before being rolled. Very hard to tell which it is when you are looking at it, but the pulp-dyed paper has a more thorough dye-job and though it will fade, it will appear to fade slower as there is more dye throughout the paper.

Finally, and probably most important to your paper looking good over hundreds of years, you should frame ALL your papercuts. All of 'em. These buggers are dust magnets and are too delicate to easily clean. Always use UV glass, which will help block some of the damaging ray of the sun from fading or otherwise altering your paper. Keep the paper out of direct sunlight, and away from exterior walls (walls where the other side of the wall is the outdoors) unless your house is very well insulated. The temperature changes of exterior walls aren't terribly bad for your paper, but the more stable you can keep your piece (heat, light, moisture, etc) the less likely your piece will deteriorate over time. Think about mummies: deserts are always dry and pretty much the same weather all the time= preservation. Submerged wooden ships stay in pretty good shape because they are always wet and about the same temperature. Fences in New England, where the weather is always changing and there is about a 100 degree range of temperature throughout the year rot.

Thursday, February 11, 2010

Guide to papercutting: Adhesive

Okay, this has been a long-time promised post, and a BUNCH of people have written me to ask, so here it is: My guide to Papercut Adhesives.

Well, really it's just adhesive, since I pretty much only use one.

It's called Studio Tac or Letra Tac. Both are made by Letraset. I'm not sure exactly what's happening, but it appears the Studio Tac (blue package) is being phased into Letra Tac (yellow package). You can order Studio Tac from Blick online, but if you go to the store, they sell the Letra Tac.


No matter, it's all the same stuff.

Essentiall, this adhesive is a sheet of thousands of very small white silicon adhesive dots. They are packaged in sheets, with a a wax paper cover. You place your artwork on the dots, then rub the back, which sticks the dots to the back of the design, then you peel off the design and stick it to your background. Pretty simple, and it has great coverage.

They stick very well. I have several mess-up papercuts that I simply slapped on my studio walls, and they are still up there after months of dramatic temperature changes and no glass covering.

A few very very helpful tips.

1. It sticks pretty good, so be very careful removing your piece from the wax paper.

2. It's technically repositionable, which is great for when you stick it down not quite in the perfect spot, but it is very good at long-term adhesive.

3. Because it's silicon, it has a bit of a rubbery ness that allows your piece to expand and contract with weather and not become detached. I've had pieces adhered for years without any sign of detachment.

4. Personally, I would avoid the "permanent" kind since the regular kind is quite permanent and still allows repositioning.

5. Place your piece upside down on the sheet of wax paper that isn't covered in dots, then press the sheet with dots down onto the back of the piece. It stops the piece from moving and getting wrinkles, trust me.

6. Rub the back of the piece (the side with the dots) not the front of the piece. This makes the dots stick more thoroughly

7. When mounting your piece, lay your piece face down (sticky dots up) on a grided surface, like a quilters mat, and use the grid to place the piece in the right spot, then take your pre-cut background, and line it up with the grid, and slowly fold it over your papercut. This I have found to be the best way to mount your work without damaging, folding, creasing, or otherwise messing up your papercut.

8. This adhesive works best for white backgrounds as tiny bits of the dots will overhang your papercut. If you are adhering it to a white background, these will become completely invisible, but if you are mounting to a colored background, they may be very noticeable and I recommend a different adhesive like double sided tape.

9. If any stray dots get on your work, you can remove them with a very clean soft eraser and they come right off.

10. #9 is especially helpful if you accidently put the wrong side down and cover your presentation side with thousands of tiny sticky white dots.

Photos of me using the Studio Tac:


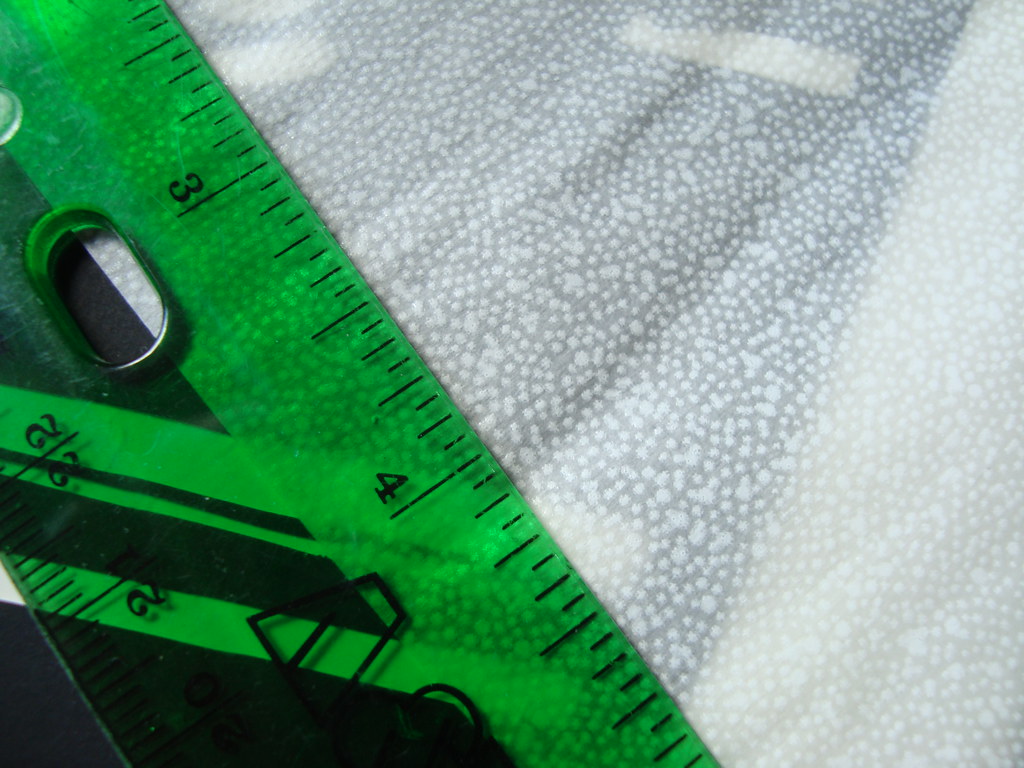
Each of those dots is a dot of adhesive, and yes, I accidentally covered the back of my ruler with studio tac taking this photo


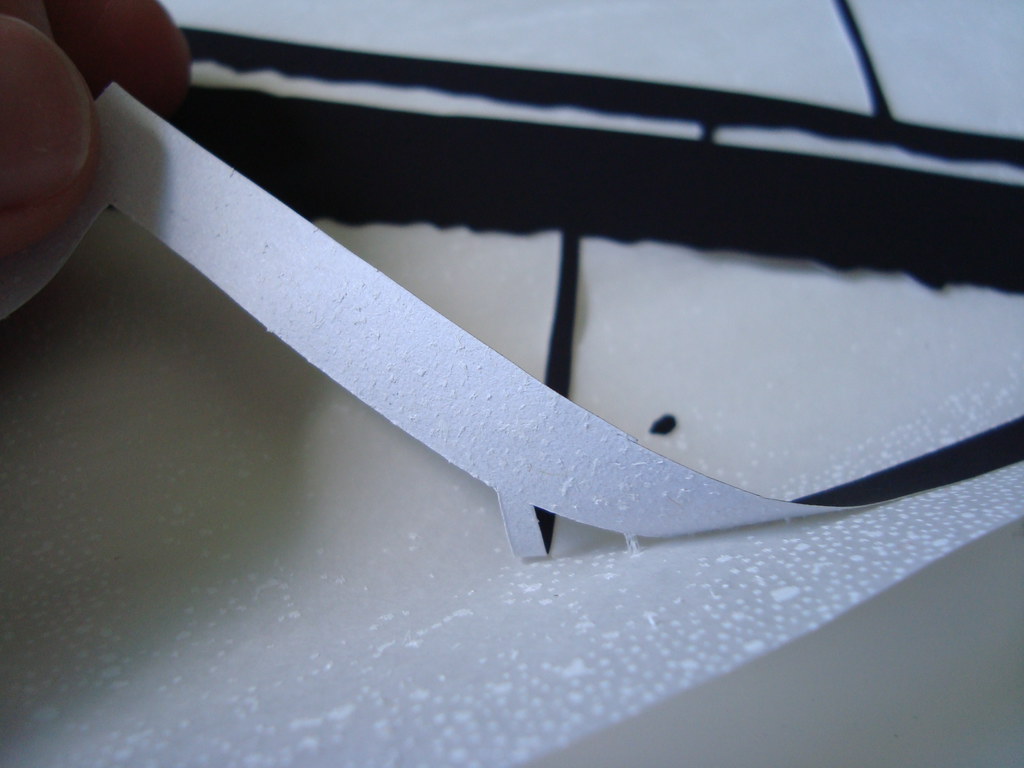
This shows me pulling one of my papercuts away from the adhesive. Note the fact that one side of the paper is white. I'll discuss that in my next post...

Next helpful post will be on the paper I use. Feel free to ask any questions in the comments section. I'll answer them the best I can.

Thursday, January 28, 2010

Hard work (and a little play)

The valentine's day orders are rolling in left and right, which is fantastic considering last year I literally did not sell a single piece that I knew was going to be a V-Day gift.

Right now the two biggies are my custom silhouettes and hand-cut valentine


Anyway, the real point of this post isn't to get you guys to buy stuff, but to encourage you all. Last January was the start of what I call "the rough months". My sales plummeted, almost nobody was interested in my work, and the entire country was in near-panic over the economic situation.

The incredible amount of "down time" allowed me to focus on my art, get some pieces cut, and come up with new ideas for my etsy shop. It got so bad that in February of last year I had $300 in total sales. That isn't profit, that's TOTAL sales. It was rough, and when you are working 40+ hour work weeks and seeing nothing for it, it hurts. Wasn't much better in January or March. Fortunately we were expecting a dip after Christmas and cut our spending WAY back and just managed to squeek by through March.

If you are also self employed and facing a minor crisis and possibly considering quitting, look at your goods. Look at your website, blog, twitter, facebook, etc. What can you do better? Think of it as a bit of a vacation and do something crazy as an experiment. Can't get much worse right?

I did some CRAZY pieces last winter, and I don't have them any more, because come summer and fall, I had a better blog, a better site, increased my items in my etsy shop (more items, the better I have found) and had a TON of new pieces that were ready to go any time a show came up and sold a bunch of pieces.

If you need help, tips or encouragement, especially these slow times, I'm a pretty good cheerleader. Drop me a note!
~Joe


Wednesday, January 27, 2010

Terminal 22 Papercuts Show

Just sharing the announcement for the Terminal 22 Papercuts Show including seven of my pieces:
If any of you happen to be over in the San Francisco area, please attend the show and let me know how it goes. Unfortunately I won't be able to make it!

Tuesday, January 26, 2010

Experimentation!

I've been itching to make things, but lately it's been of the 3D variety.

For starters, I made a paper collar my wife was kind enough to model for:

Link to Etsy Listing:
Radiant- Avant Garde Paper Neck Piece

I have another collar that's all done, just need to photograph it and list it.

I also had an idea last night about combining papercutting with origami. Wasn't sure if it would work, and it, guess what, it did!

This one's 14x14x8


Etsy Listign: Origami papercut crane with branches

This inspired me to make this smaller one (7x7x4), which I cut out all the "panels" between the folds making a paper crane skeleton:


Etsy listing: Origami paper crane skeleton

Let me know what you think!


Monday, January 18, 2010

Tools of the trade- Knives

I get a bunch of emails each month asking how I make my papercuts and the materials I use.

I thought it might be a good idea to make some posts about my techniques so others can give it a try themselves. Plenty of room in the world for more papercutters!

I'll be focusing on knives. I use exclusively Xacto products just because they are, in my opinion, the best available. Trust me, I've tried them all.

A quick note on terminology: Knife is the handle, blade is the sharp part that the knife holds.

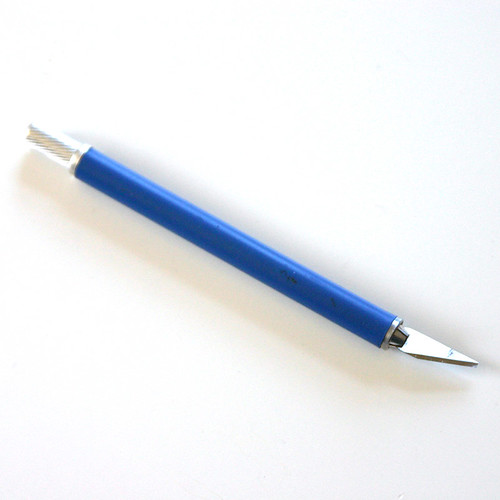
Here are my two main knives (I have pretty much every product Xacto makes, but these are my most used ones)

Xacto X3627 Gripster Soft Grip Knife- available everywhere


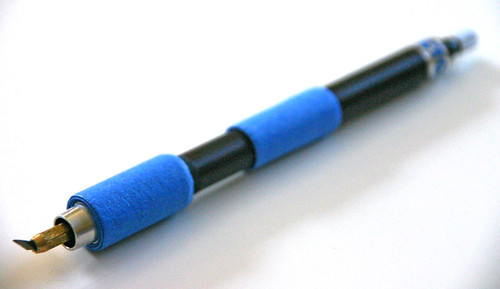
and my piece de resistance: Xacto 3051 Professional Swivel Knife. (shown with some blue painters tape to thicken it a bit and make it more comfortable for my hands)


Xacto no longer makes the 3051, and I only have one that was given to me by a friend who did rubylith cutting for billboards in the 70s (that's how old the knife is). If you find one, I'll buy it off you! Actually, my birthday is coming up on Feb 3rd...

The Gripster takes standard #11 blades. I use this knife for all my straight cuts as it is very easy to cut a perfectly straight cut with a standard xacto knife/blade.

The Pro swivel knife, however, is pretty much the greatest thing ever and I'd love for Xacto to start producing the knife again (are you listening Xacto???)

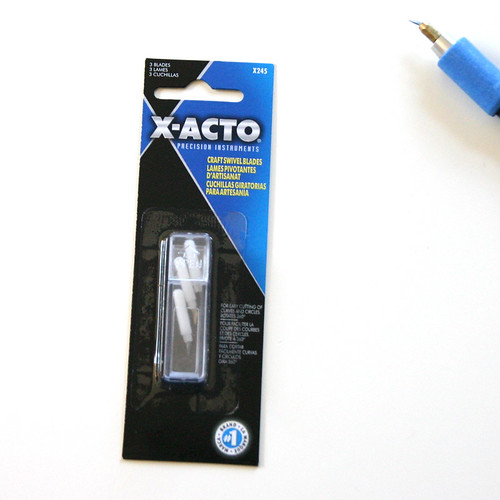
This swivel knife, unlike the swivel knife Xacto makes today, is entirely made from metal. There are tiny ball bearings that allow the blade to rotate in the knife without having any wiggle to the blade. The currently available swivel knife allows way to much movement of the blade inside the knife, so trying to put the tip of the knife exactly in the right spot is difficult because the blade wiggles a bit as you press it into the paper (bad).

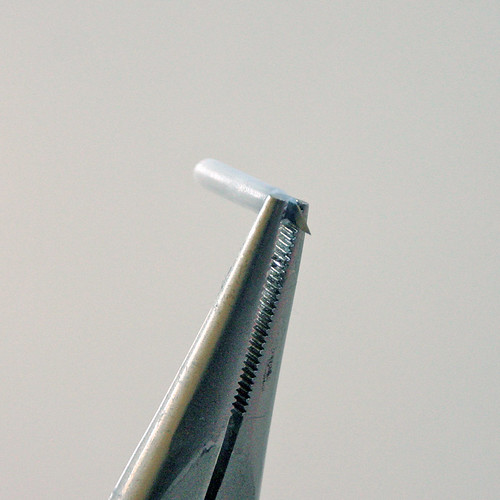
While they say you cant use the current swivel knives available at stores (they come in a tiny plastic tube and each blade is encased in a white piece of plastic), I found that you can still use the blades for the old style knife, you just need to take the blade out of the plastic case. This is very easy.

I really wish Xacto did not package these blades with the point down as they are very sharp yet delicate. When they get jostled around on the shelf or in shipping, the tips can sometimes break off in the package. At $1 each, I don't want to waste ANY blades in the package and I'll check every one before I buy them.

I use a pair of pliers and squeeze the plastic case just below the blade. This crushes the plastic and loosens the blade, then I take the pliers, pull the blade out, and put the blade directly into the pro swivel knife, which holds the blade in a brass mechanism. A bit of work, but totally worth it for the stability of the pro knife.


The best thing about the pro knife is that the blade swivels inside the knife so incredibly smoothly, you can cut your work just like you would drawing with a pen. Here's a video of my using my swivel knife to cut a piece. It doesn't cut straight lines very well though, that's why I use the traditional knife with #11 blades.


I hope this was helpful to all of you. Please feel free to ask any questions in the comments, I read them all, and I'll try to answer them all.

I'll be doing another post on paper, adhesive, and design.


Thursday, January 7, 2010

Papercuts By Joe the movie!

Just uploaded this video to youtube showing some of my work, and some in-progress photos showing them being made.

Happy New Year

So I'm starting this year off by actually following one of my resolutions: Blog more.

With that, here's my biggest announcement of the new year: A new gallery show!

Just before New Year's Eve, Jessie Wusthoff, of Terminal 22 Gallery in Oakland, CA (Just east of San Francisco) wrote me saying she her gallery has a show coming up in February featuring paper artists and she has openings.

I was quite surprised to hear she wanted several pieces, and more than happy to accommodate!

I will be sending SEVEN pieces, including two large pieces made especially for the show.

Unfortunately, because it's such short notice, I will not be able to attend the opening personally, but my spies in CA (fellow full-time Etsy artists) have agreed to attend and take some photos for me.

I'm extremely excited about the show! Rarely do I get the chance to have people know what my medium is before the look at the piece, so unless I get to talk to them personally, many think they are prints, woodcuts, pen&ink, etc.

This will be my first West Coast show, which is exciting for being what it is, and also I can now say I've shown in galleries across the country:)

I've read some great reviews of the gallery and I trust them to show my work well.

Show info:

The Paper Show
Terminal 22
2443 Telegraph Ave.
Oakland, CA 94612


Opening Gala: Feb 5, 6-9 pm

My birthday is the 3rd, so I'm considering this a great present!

I hope any of you Bay-area people can make the show and let me know how it goes (and buy a piece!)