Showing posts with label papercutting. Show all posts

Thursday, May 19, 2011

Making my own road map

A very interesting and somewhat surprising thing has occurred since Craft Boston: I seem to be becoming a successful artist...who knew?

(warning, long post, but I hope an interesting one)

I'm at a crazy point in my life full of Big Decisions. To set the scene, I need to give you a bit of the backup story. Bear with me if you've followed this blog for long enough to know everything here, but I've gotten a TON of new viewers lately.

I started papercutting when I was 10. I did a summer program that had an art class that for some reason had a papercutting component. Basically we traced designs from DK stencil books and cut them with razor blades and hoped we didn't loose a finger. No real instruction, we just figured it out on our own.

When the program was over, I showed my mom the designs I made and she pulled out this book:


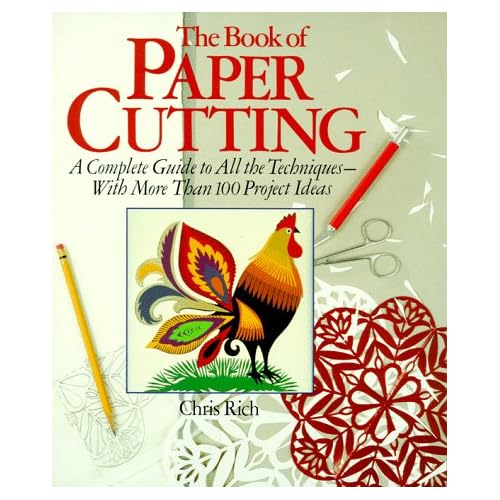
She owned a daycare that she ran out of our home and had tons of art and craft books for ideas to do with the kids. I basically copied every design from the book over the next 10 years, and essentially taught myself papercutting by just doing it for hours and hours.

Fast forward to college, I attended Boston University where I majored in Archaeology. During my Senior year, I started to papercut again based on some of the designs I saw on pottery and old art from my text books. I later got into photography and started making designs using my photos as references and developed my own style: highly detailed and "crinkly" for lack of a better term. Basically, I don't use very clean lines, deliberately, to better reference textures.

I have had several jobs in Archaeology since graduating in 2006, and have been papercutting the entire time. In 2007, I started selling on Etsy, just for fun, and the recession led to me and my wife (also an archaeologist) loosing our archaeology jobs. Since we both had the same qualifications and would be competing with each other, we decided that she should look for employment, and I would give the papercutting thing a go full-time.

At this time, I had started to challenge myself with very difficult designs and they started to gain some appreciation online and many sold. I was already making about as much as I was working, so making the transition to full-time art seemed to make sense giving our employment opportunities (or lack thereof)

Since 2007, I've been papercutting full time, and for a period I have also had a second full-time job as an archaeologist (May- Dec of 2010). I would create my designs from the hotel room I stayed in during away projects all around New England and would ship pieces during the weekend. I was honestly working about 80 hours a week and very much had two full time jobs.

I have never wanted to give up archaeology for art, but I never want to stop papercutting. After five years of trying and almost giving up hope, a few months ago I found out that I was accepted into a Masters Program at UMass Boston for archaeology.

About a week later, I showed my work at Craft Boston. That's where this story gets really complicated.

Craftboston was so beyond my wildest hopes for a successful show, and the sales that have occured directly resulting from the show have been almost as great. This "Art Thing" is doing really well. Really really really well. In my opinion, I'm a bonified successful artist right now. Not Warhol-successful, but for someone who cuts holes in paper and has no formal art background...

AND, I'm about to start a new chapter in the world of archaeology, with a couple potential jobs already on my radar. What to do?

Answer: Make hard choices. Apparently.

I've made the decision that I will be a professional archaeologist, a damn good one too, and also be a professional papercutting artist, one of the best ones in the world. Totally possible.

I never took a single art class after 8th grade so I have absolutely no idea what I'm doing. Fortunately I'm ambitious, have an amazingly smart and encouraging wife, and the internet and books exist, so I've been able to make it so far.

I have a few major archaeology projects this summer, but regarding the art I'm making the following choices:

1. Reduce the smaller 8x10 non-one of a kind pieces on etsy. Love designing them, love their price point and the income they generate, and I love having them as an option for my customers but they keep me very very busy and sometimes I don't have time to create larger more significant pieces. So, you may notice that my designs have decreased in number from about 120 to about 85. That number may go down again soon.

2. Raise the bar. For myself and all other papercutters out there. Bring it! I've recently completed two personal challenges. How small can I make a complicated design, and how detailed can I possibly make my designs.

Here's the small pieces:


^ Skyline of NYC

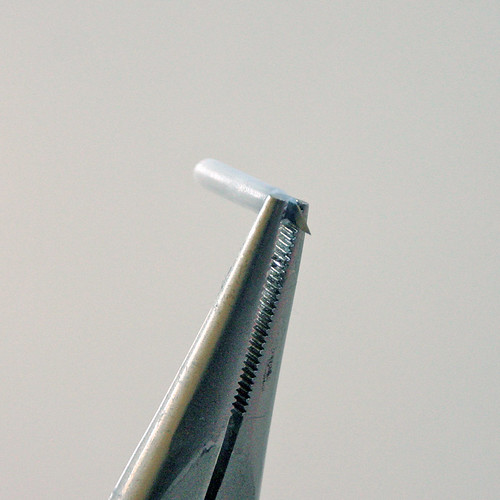
Micro Kissing on a bike, about the size of a nickle

Both were cut using a jewelers loop

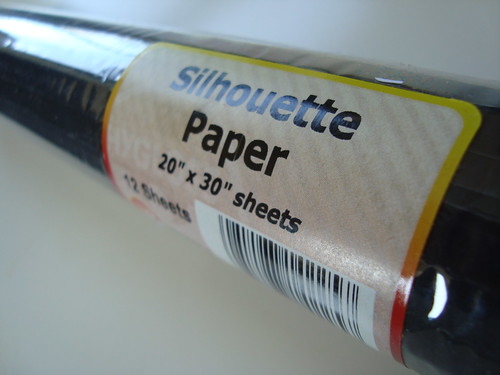
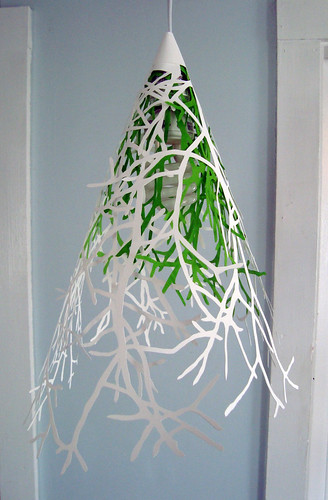
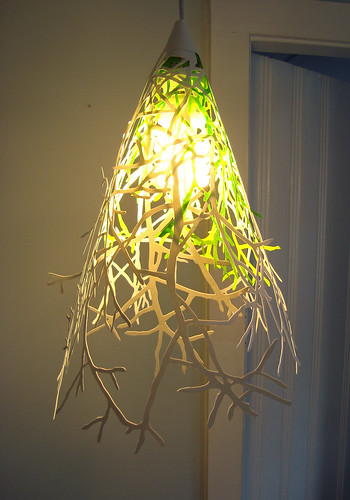
And here's a branch piece I'm almost done with. It uses a complete sheet of my black paper (30x20 inches) and is the largest size they manufacture this paper. It has about 20,000 holes in it. It will be at the Public Museum during the Grand Rapids ArtPrize competition. Not sure if I will pre-sell it since I have agreed to have it in the show. The price is $7,800. If someone is interested in purchasing it, please email me (Papercutsbyjoe@gmail.com) to discuss the sale. I am willing to split any potential prize money (up to $250,000) if it is purchased prior to the show.


Having finished both, however, I now know that I can't really do things smaller or more complicated. So, what to do now?

Make them BETTER and more interesting.

So, with that said, I'm setting out on a new path with my papercutting. My goal is to combine my detailed crazy-complicated designs, but with a bit less literal use of them. For example, instead of a bunch of branches, I've designed a large skull piece that is made exclusively of branches. The denser the branches, the more shading in the skull. Up close, it's a tangle of branches. From across the room it's a skull. I think you guys will really like it. I'm also working on two other versions of the same skull using Wycinanki style polish papercutting techniques and some other ideas. More of that to come as I finish them.

My new goal for my papercuts is to make a body of 10-15 large pieces, and find a gallery to show them. I really feel like this is the right direction for me. The larger more expensive pieces allow me to concentrate on design and execution of pieces.

I'm still trying to figure out how exactly to go about finding a gallery here in Boston. I may start in Portland, ME where I grew up. Great art scene, and possibly a bit easier to find a gallery. I've sold a ton of pieces now for between $1,000 and $5,000 so I know there's a proven market. Just need to raise the bar a bit more in this next batch. Reading a ton of books on art careers. Wish I had made those important connections you get in art school, but there's plenty of ways to skin a cat, and perhaps not having a clue what I'm doing is charming, right? We'll see.

Here's my reading material:
and


This can't hurt, so here goes: If you're a gallery and like my work, contact me (papercutsbyjoe@gmail.com). I have design proofs of some of the pieces I'll be making for the body of work.

I have no idea how far I can take this. My work really doesn't have a "message", it isn't political, and I never want it to be. I'm hoping people and Art People can recognize it for what it hopefully is: Something beautiful, visually interesting, and mind-blowingly cut from paper.

If you aren't a gallery, keep coming back, follow my facebook page (updated often) and hang on for the ride! I have no idea where it is going but I'm working my ass off to make it as successful as possible!

Thanks for making it to the end of this really long post, I appreciate it.

Monday, March 22, 2010

Guild of American Papercutters

You are now reading the blog of the newest member of the Guild of American Papercutters Board of Directors, the largest organization of papercutters in the western hemisphere.

I received word of my nomiation from Marie-Helene Grabmanm, the president of the Guild, about a week ago and just heard last night of my unanimous acceptance onto the board.

I very much look forward to being an active participant in the Guild's growth and I am truly honored and flabbergasted that I was even considered!

To find out more about the GAP, to become a member (we publish a quarterly magazine with new art, history, and news from around the world), and to see the work of local and international papercutters, visit their site at www.papercutters.org

Sunday, February 14, 2010

Papercutting tips: Guide to paper

Like the adhesive post, this post is also focused mostly on one product, but I'll include some helpful tips afterwards for picking out good paper.

I use, pretty much exclusively, Hygloss Silhouette paper from DickBlick: http://www.dickblick.com/products/hygloss-black-silhouette-paper/

I buy it in rolls of twelve 20x30 sheets, and depending on how busy I am they last about a month or two.

Silhouette paper from Blick in the roll

An un-cut sheet of silhouette paper

This paper is incredible! It is actually white paper that has been covered in a thin layer of matte-black paint. This is good for two reasons: 1, you have one side that is white so you can draw a design on it, and 2. because it's painted, there is less chance of the black fading over time. More about that later.


The "white side" of the paper

I work from the white side of the paper, which means that when I'm done, my designs get flipped around. This is very important when you work from the white side! If you are doing anything that can not be backwards (text, recognizable architecture, etc) you will need to cut your design backwards. In my case, I always create my designs in the computer (easy to resize, tweek, and otherwise mess around with my original designs before cutting them), so before I start cutting I flip my designs backwards, print them as a pattern, and adhere them to the white side of the paper with a bit of light-tack spray adhesive from Krylon

When I finish cutting the design, I peel off the pattern and flip the silhouette paper over to the finished black side.

One draw back of this particular paper is that it does come very tightly rolled, so the paper has a lot of curl to it when you first open it. I have a very large wooden shelf-like thing that store my unrolled paper in. I put the sheets of silhouette paper between two larger sheets of regular paper and then put something heavy on top to hold the paper flat. In about a week most of the curl is out of the paper, but the first few sheets really want to roll while you're working with them.

Another minor drawback is that because it's painted, not dyed, it doesn't like to be folded. The paint doesn't crack, but you can definitely see the white try to peek through the black along the folds. Also creasing the folds can lead to abrasion of the paint and wear it through to the white.

Don't iron them! I tried this and it made them kind of wavy even without steam. Not sure why. Just press them between something heavy.

Okay, that all said, here are some more general tips on picking out paper:

- Acid free and Lignin free are EXTREMELY important! Can't stress this enough. The natural acid and lignin found in most wood/paper needs to be removed or your paper will discolor, become brittle, and possibly simply fall apart over time. Look for fade-resistant paper (should be labeled as such) if you are using non-white paper. The paint on the sihouette paper is much less likely to fade as it is more light-fast

-Thin is good, but too thin is a nightmare. You want the paper to be easy to cut, but not so fragile that you are constantly tearing it. I recommend not going much past 70 pound paper unless you want a really good hand cramp.

-Texture is very important. You want the paper have very tiny fibers in it. If the fibers are too large, your corners and areas where the paper isn't cut completely through will have stringy bits of fiber sticking out of them. This is a huge pet peeve of mine and, in my opinion, a very good indication of the quality and skill of a papercut. You want all your edges, corners, and cuts to be clean with very little overcutting (cutting beyond the intersection of two lines). Hand-made paper is beautiful and I would love to work with it, but it's extremely fibrous. I'm not above tearing a 2mm tear in the edge of paper to see how clean it is, but you can usually tell just by running your hands on the paper. The less texture, the smoother the paper, the better.

Some paper is actually died after it is rolled, whereas with others, the pulp of the paper is dyed first before being rolled. Very hard to tell which it is when you are looking at it, but the pulp-dyed paper has a more thorough dye-job and though it will fade, it will appear to fade slower as there is more dye throughout the paper.

Finally, and probably most important to your paper looking good over hundreds of years, you should frame ALL your papercuts. All of 'em. These buggers are dust magnets and are too delicate to easily clean. Always use UV glass, which will help block some of the damaging ray of the sun from fading or otherwise altering your paper. Keep the paper out of direct sunlight, and away from exterior walls (walls where the other side of the wall is the outdoors) unless your house is very well insulated. The temperature changes of exterior walls aren't terribly bad for your paper, but the more stable you can keep your piece (heat, light, moisture, etc) the less likely your piece will deteriorate over time. Think about mummies: deserts are always dry and pretty much the same weather all the time= preservation. Submerged wooden ships stay in pretty good shape because they are always wet and about the same temperature. Fences in New England, where the weather is always changing and there is about a 100 degree range of temperature throughout the year rot.

Tuesday, January 26, 2010

Experimentation!

I've been itching to make things, but lately it's been of the 3D variety.

For starters, I made a paper collar my wife was kind enough to model for:

Link to Etsy Listing:
Radiant- Avant Garde Paper Neck Piece

I have another collar that's all done, just need to photograph it and list it.

I also had an idea last night about combining papercutting with origami. Wasn't sure if it would work, and it, guess what, it did!

This one's 14x14x8


Etsy Listign: Origami papercut crane with branches

This inspired me to make this smaller one (7x7x4), which I cut out all the "panels" between the folds making a paper crane skeleton:


Etsy listing: Origami paper crane skeleton

Let me know what you think!


Monday, January 18, 2010

Tools of the trade- Knives

I get a bunch of emails each month asking how I make my papercuts and the materials I use.

I thought it might be a good idea to make some posts about my techniques so others can give it a try themselves. Plenty of room in the world for more papercutters!

I'll be focusing on knives. I use exclusively Xacto products just because they are, in my opinion, the best available. Trust me, I've tried them all.

A quick note on terminology: Knife is the handle, blade is the sharp part that the knife holds.

Here are my two main knives (I have pretty much every product Xacto makes, but these are my most used ones)

Xacto X3627 Gripster Soft Grip Knife- available everywhere


and my piece de resistance: Xacto 3051 Professional Swivel Knife. (shown with some blue painters tape to thicken it a bit and make it more comfortable for my hands)


Xacto no longer makes the 3051, and I only have one that was given to me by a friend who did rubylith cutting for billboards in the 70s (that's how old the knife is). If you find one, I'll buy it off you! Actually, my birthday is coming up on Feb 3rd...

The Gripster takes standard #11 blades. I use this knife for all my straight cuts as it is very easy to cut a perfectly straight cut with a standard xacto knife/blade.

The Pro swivel knife, however, is pretty much the greatest thing ever and I'd love for Xacto to start producing the knife again (are you listening Xacto???)

This swivel knife, unlike the swivel knife Xacto makes today, is entirely made from metal. There are tiny ball bearings that allow the blade to rotate in the knife without having any wiggle to the blade. The currently available swivel knife allows way to much movement of the blade inside the knife, so trying to put the tip of the knife exactly in the right spot is difficult because the blade wiggles a bit as you press it into the paper (bad).

While they say you cant use the current swivel knives available at stores (they come in a tiny plastic tube and each blade is encased in a white piece of plastic), I found that you can still use the blades for the old style knife, you just need to take the blade out of the plastic case. This is very easy.

I really wish Xacto did not package these blades with the point down as they are very sharp yet delicate. When they get jostled around on the shelf or in shipping, the tips can sometimes break off in the package. At $1 each, I don't want to waste ANY blades in the package and I'll check every one before I buy them.

I use a pair of pliers and squeeze the plastic case just below the blade. This crushes the plastic and loosens the blade, then I take the pliers, pull the blade out, and put the blade directly into the pro swivel knife, which holds the blade in a brass mechanism. A bit of work, but totally worth it for the stability of the pro knife.


The best thing about the pro knife is that the blade swivels inside the knife so incredibly smoothly, you can cut your work just like you would drawing with a pen. Here's a video of my using my swivel knife to cut a piece. It doesn't cut straight lines very well though, that's why I use the traditional knife with #11 blades.


I hope this was helpful to all of you. Please feel free to ask any questions in the comments, I read them all, and I'll try to answer them all.

I'll be doing another post on paper, adhesive, and design.


Tuesday, September 8, 2009

The road to the Boston Ahts Festival: 4 days to go

Hi everyone,

In my quest to be fully prepared for the Boston Arts (Ahts) Festival I'm going to be posting what I'm working on each day. I have four days to go and about six days of work left to do, so this will be interesting.

Over the long weekend we found out where the tent will be, which happens to be right in the middle of everything. This is great, because I've noticed tents on the ends seem to get passed up as people first arrive or leave. Also got some orchids for the tent. We decided that when you decorate your tent, it looks like you were so prepared that you even had enough time to bring in flowers. Gives a very good effect, and really instills confidence in people viewing your work. Also got a couple people to come in my tent in South Portland just to see the flowers. Can't hurt!

Here's the view from my future tent spot:


I found out we're sharing a 9x20 tent, which has me a bit scared because I want to hang a wall on three sides and I'm not sure my tent-mate will appreciate a wall hanging between us. I had thought we'd each be getting a 10x10 tent and we wouldn't have to share any walls. Hope it works out because I'm bringing three walls worth of stuff to hang regardless!

Today, my goal is to get the custom pieces that were ordered over the weekend done so I can focus on the Boston pieces. That was quite a task! Two were extremely difficult pieces with tons of very fine cuts with very little support. The hardest part is going from finished cut to mounted piece. Today I had to take this:

And make it look like this:Took forever!

I just got my very first order of 15 frames, all the framing supplies, and glass. I hopefully will be offering my custom pieces with custom framing options:)


I also have to finish my series of Boston pieces I created just for the show. These six pieces are the highlights of the show. Only one is not quite finished, but that should happen today or tomorrow. Here they all are unmounted.

It looks like it might rain Friday but will be great the rest of the weekend. Hope it isn't too bad! Three days is going to be a looooong time to stay outside.

I'm a bit worried I'm putting too much hope into this show. Don't want to be disappointed. The Art in the Park show went so incredibly well, and this show is three times longer with five times more people, so I'm really crossing my fingers!

Okay, back to work!

Tomorrow: the 8x10s and some framed work.

Friday, August 21, 2009

South Portland Art in the Park

Art in the Park was waaaaay back on the 8th, but as soon as we got back, we both had to dive straight back into work and this is my first chance to finally share what happened.

The event was about 500 feet from my family's home in South Portland, so we had free housing during the weekend. My mother happened to be in a store while we were driving north from Boston and found a white EZ-up tent for less than half I've ever seen it, so I got her to nab it for us. Now I had a great white tent, which, unfortunately, has been proven to attract more people to your work than a blue tent. Weird.

Anyway, on Friday we had to frame the 19 pieces that still needed framing before the show the next day, so that took nearly the entire day but came out great! We also had the opportunity to borrow 8 segments of grid wall to hang the heaviest pieces (thanks Harriet!)

The day of the show went incredibly smoothly. Most of my family was there to help set up the tent, and the rest were able to stop by throughout the day.Weird story- My sister had been on a whale watch tour in Portland the week before the show, and it turns out the boat she was on, was the same boat featured in my piece, Odyssey. She called the number on the brochure for the tour and got a hold of the woman who used to own the boat and invited them to the show with out me knowing. Soon after the show started she arrived, introduced herself and told me she used to own the boat and loved the piece. After leaving, she apparently called the current owner of the boat, who came to the show soon after, and purchased the piece! I'm so happy the piece will really be appreciated!

So after that great start, tons of people stopped by to view my work, and were incredibly kind and supportive. We had a great time. Jen told me that at one point there were 19 people in the 10x10 tent! Not bad considering there were 184 other artist at the same show!

Ten smaller pieces went home after Odyssey was purchased.

At the very end of the show, many people started breaking down about a half hour early and I refused since there were so many people that expressed interest in pieces that were still remaining. Literally five minutes before the end of the show, my mom, who was helping break down the display,grabbed the largest piece, Hand, off the wall and began carrying it out to the truck.

A woman and her daughter stopped her and asked if someone had purchased the piece as they were interested in buying it.

Turns out the daughter is completely redesigning her bedroom and wanted a piece of art for it. Her mother agreed and out of the 185 artist there, she chose my piece for her room! I was incredibly excited. Two of my largest pieces found great homes that day.

In the end, 12 pieces went home, and I sold most of the remaining 2008 Christmas ornaments (have to start designing the 2009 ones soon!) The weather was perfect, the people were great, the other artist were kind and had incredible work on display. Didn't go home with any prizes, but my stuff is too "not-a-painting" to get much interest by judges, but I bet I sold more than almost anyone at the show.

Now, as a somewhat odd consequence, I have to really crank out some new pieces for the Boston show. It's three days long, so I really need to pack the tent incase stuff sells as well as it did at the Art and the Park. Wouldn't want an empty tent on the third day. Acutally, that would be nice:)

Monday, July 6, 2009

Accepted! Boston Ahts festival 2009

Woo-Hoo!

Just got a weird letter in the mail from the city of Boston (parking ticket?). No, it's an acceptance letter from the Mayor for the 2009 Boston Arts Festival! I applied back in March and pretty much forgot about it. I had a string of rejections lately so this was very nice to hear.

I was one of 60 artists accepted, so I'm damn proud of that alone. I think it didn't hurt that I was in the deadly-competitive paper category (ha ha)

The festival is located between the North End, Quincy Market, and the Aquarium in Downtown Boston, so TONS of people will be walking by. Last year, they said 50,000 people attended!

Blue Man Group, the Boston Pops, the Boston Ballet, the Opera, etc. have performed so there should continue to be a big turnout. Here's the official website: www.bostonahtsfestival.com

I would love to see some of you if you happen to be in the area!

Saturday, June 27, 2009

New space, and a new papercut!


Just got back from Haymarket in Boston with bags full of fruits and veggies. Got four quarts of strawberries, four pears, two pounds of cherries, two ponds of roma tomatoes, a pint of blueberries, and eight kiwi...all for $11. I freaking love Boston!

Anyway, I'm just posting now that we are completely unpacked and back to work. Below is my new work space. I just hung up a ton of art and pretty much filled the book cases so it looks a bit busier now, but I now have an entire 12x12 room for my papercutting!


I've been doing between 5-10 custom papercuts every week since May so that's the biggest reason I haven't been posting much lately. It's definitely been my busy time of year with anniversary present requests rolling in. I haven't had much time to do more my-style pieces, however I did get a spare half-day yesterday to finish the piece below that I've been working on for about a month. It's of the Second-Empire building that housed Boston's City Hall from 1869-1965. Below are images of the city hall, the papercut, and just some shots to show scale and that it truly is cut from paper:) I haven't mounted the piece on its white background. Right now it's on a green cutting board and still has the support pieces I cut into the design to keep it's shape while I'm mounting. I cut them off when it's done.

That's all for now...

Thursday, April 16, 2009

Some bad news...

So Jen and I went to Maine for Easter with my family. While there, we decided to drive up the road to the Old Crow Gallery where I am having my solo show in June. When we got there, we found the gallery empty and a For Rent sign in the window.

Big time bummer...

I was quite panicked, actually, because I had thousands of dollars worth of art currently at the gallery and I had no idea where any of the piece were.

I eventually got in touch with the gallery owners, whom I love to death, and they explained how it happened. Long story short, the owners of the building were unreasonable and they had to leave shop in an extremely short amount of time and didn't have a chance to call all the artists to get their work.

So, as of right now, there will be no solo show:( Perhaps if the owners get the gallery and frame shop back up and running, I may be able to show later in the year, but for now it's all off. My pieces are going to be moved to several businesses that appreciate art and may help get my name out and possibly sell the piece off the wall.

I'm pretty bummed. I've been planning this for seven months now and had all the pieces ready to go. I've actually avoided applying to shows and galleries in June so it didn't conflict with the show. I'm also worried because most galleries are booked for the year (or more) so I may have to wait over a year for another opportunity to show my work.

Le Sigh.

Regardless, I'm now looking for shows and events locally to get the word out about my papercuts in town. We just decided to not move out of town, and found a beautiful tiny house to rent with a great finished shed (more of a separate building/room with windows and heat and everything) that will become my studio.

Not all bad news, but still pretty bummed about the show.

Oh, I'm on twitter now too. Terrifying, but maybe it will drum up some support or sales?

Thursday, April 2, 2009

Introducing: Make

Make
16x28 mounted to 20x30
Single Sheet of Black Paper


Inspired by my previous work, I, I have continued experimenting with texture and scale with this papercutting of my left hand. I was sitting at my desk working on some custom pieces when I noticed my hands were extremely dry. When I looked at them up close, the sun was coming in through the window behind me at the perfect angle. I could see all the wrinkles and grooves in my palm and I wondered if I could capture it with a papercut. This is the result of a very long design process. I really fought for this one! I'm very happy with the outcome and I really love the bold graphic in-your-face quality, but it also has a tranquil side...somehow. Hope you like!


Tuesday, March 10, 2009

An homage to Tord Boontje

I had a wonderful person ask me to make them a paper chandelier through Etsy a few weeks ago. After playing around with designs and construction ideas, I came up with a two-layered paper lamp.
I used paper, since the lamp will be lighted with CFL bulbs exclusively. I have had it on for several hours and the bulb is still cool enough to hold your finger directly on it, and the paper is barely warm.

What do you guys think? Sorry for the terrible photography. I just snapped a few photos to get the point accross. If I continue to make these (hopefully) I will definitely spend a bit more effort on the staging!

Anyway, there are obvious similarities to Tord Boontje's incredible lamps. Didn't want it to look that similar, but I definitely used my own technique and trademark branches design. Not too many ways to make a paper lamp without doing some sort of conical shape. Hope he won't mind. I've been a HUGE fan of his work for many many years.

What do you guys think?